10 Things You Should Know Before You Plant Anything

1. Hardiness Zone
The first step in selecting plants to install in your landscape is to know your hardiness zone. Hardiness zones are one widely used way of establishing which plants will grow in which locations. Hardiness zones, sometimes called growing zones, range from 1 to 13. Zone 1 has the lowest average minimum temperature and 13, the highest. Much of Utah sits somewhere around zone 6.
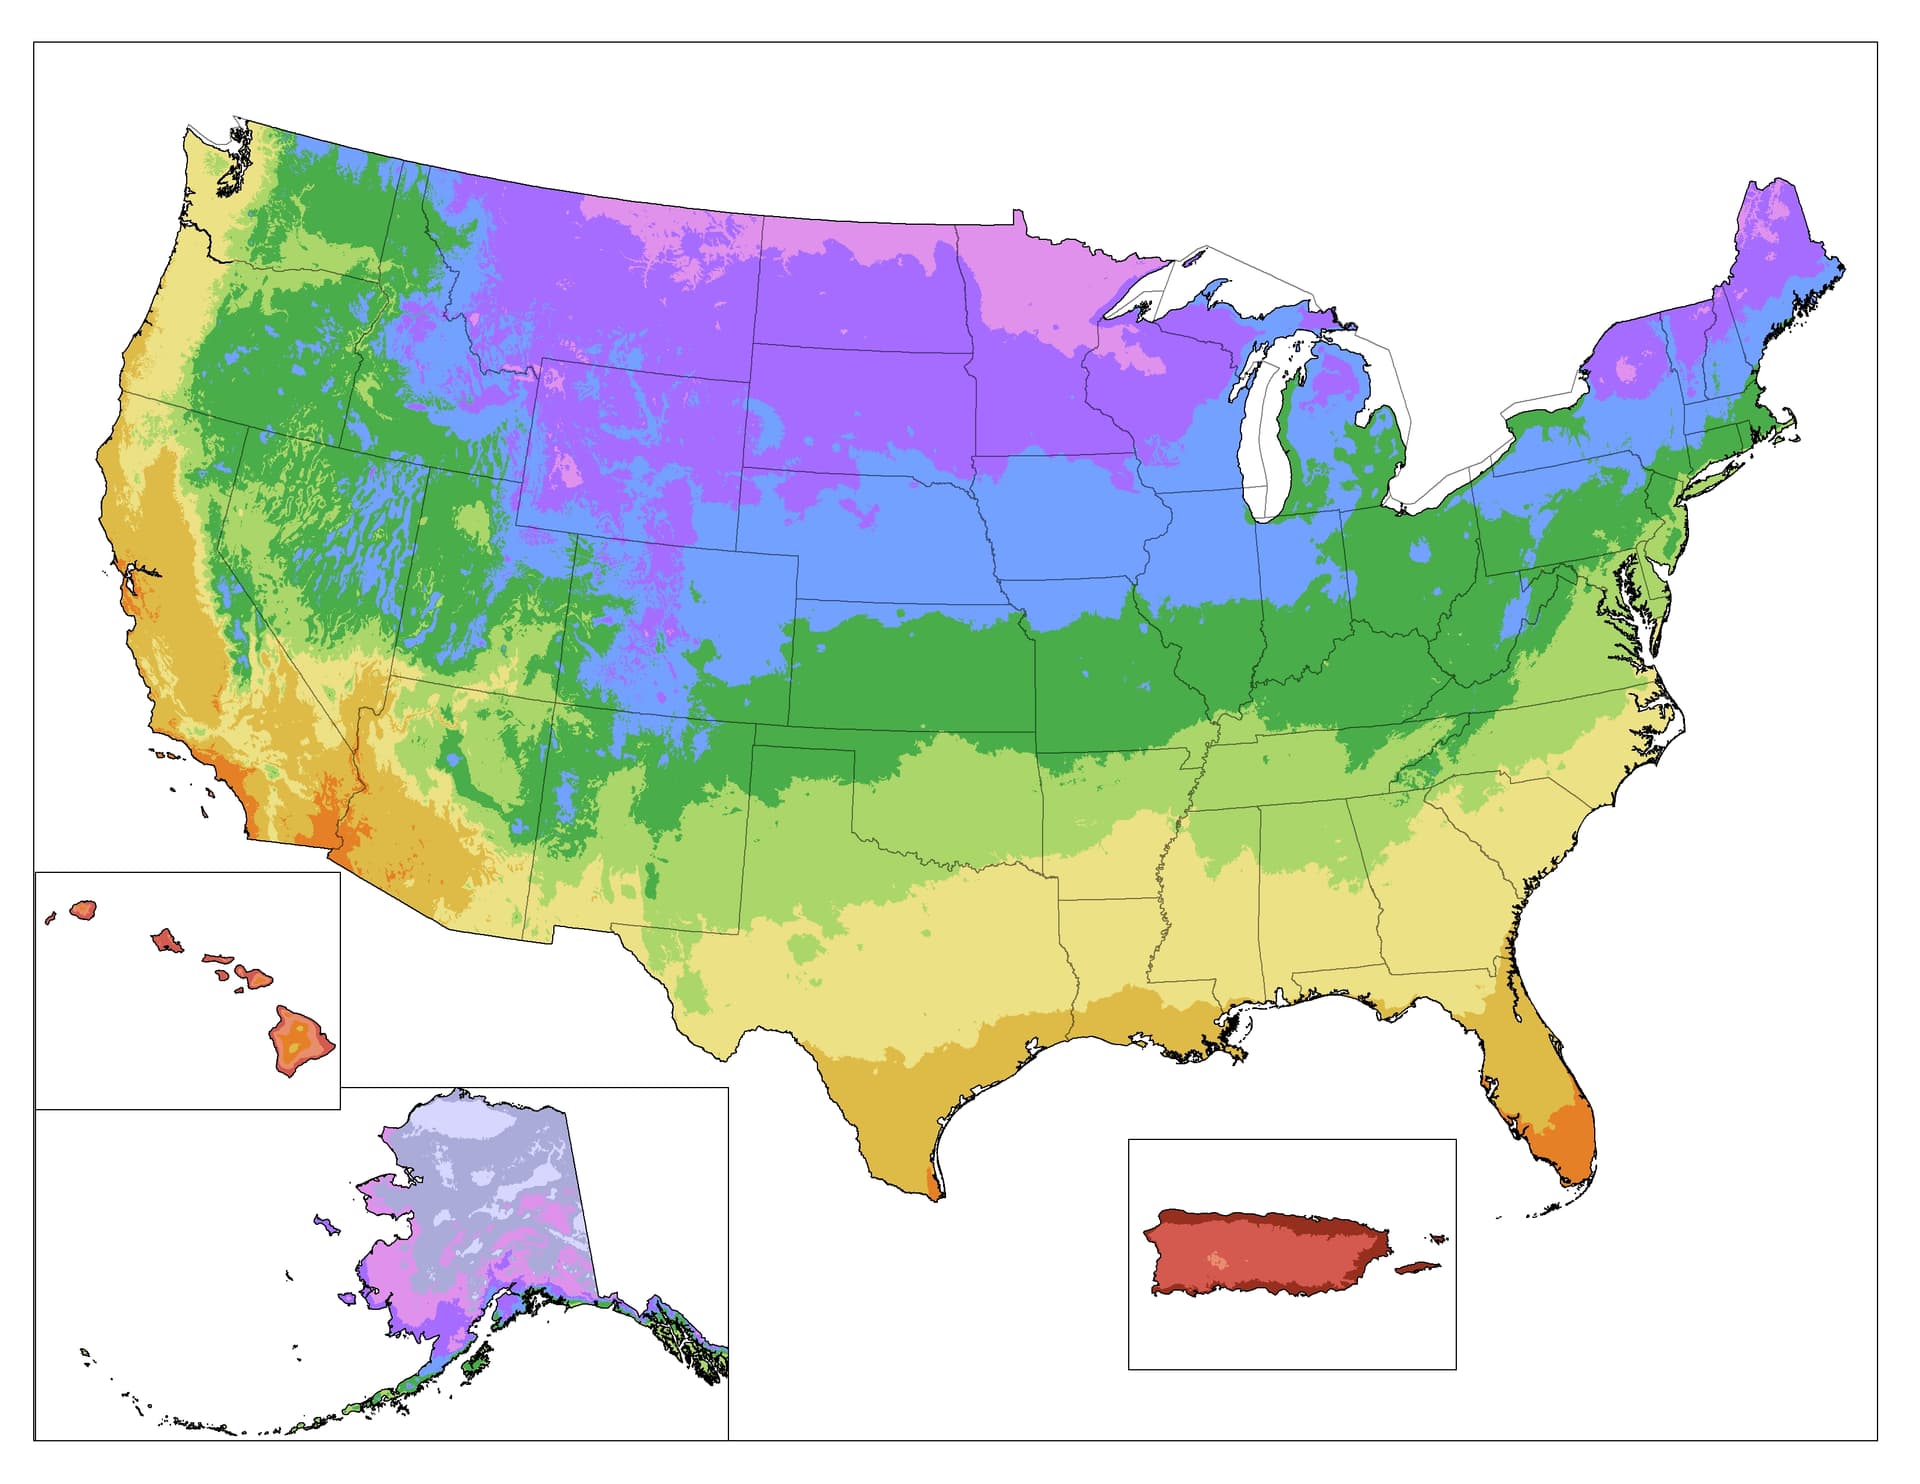
This map from the USDA makes this step incredibly easy—just plug in your address and it will tell you what zone you live in. Then you can compare that to the tags on the plants in the garden center. If the zone listed on the plant tag is equal to or smaller than the number of the zone you live in, there’s a good chance it will survive in your yard, providing you care for it properly.
2. Mature Size
Before planting, check the plant tag or look up the variety online, if the mature size is not listed on the tag. Be sure to give your plants enough space to grow to their full potential. Giving them enough space will result in thriving plants that you don’t need to constantly prune down.
Also consider the mature size of the plants surrounding the one you’re about to install. If there’s a tree planted nearby that is going to grow much bigger, is it going to completely shade all the plants beneath it? Unless you’re planting a shade garden, you’re going to want your plants outside the circle of shade so they can receive all the sun they need, which brings us to the next tip.
3. Light Requirements
Again, this should be listed on the plant tag in the garden center, but can also be researched easily. Consider the amount of light that the plant will need in order to thrive. If it’s a plant that needs full sun, don’t plant it under a tree that will cast shade on it for most of the day or on the side of your house that gets mostly shade. Give it a nice, sunny spot.
Alternatively, if it’s a plant that needs shade, be sure to accommodate for these needs. Planting a shade plant in a sunny patch will result in a scorched, wilted plant at best and a dead plant at worst.
4. Growing Requirements
Just like birds of a feather, plants with similar growing requirements will grow best when they are near each other. Plants that are heavy drinkers should be clustered together just as water wise plants can stay near each other. This will not only conserve water and money, but it will also help your plants succeed. Figure out the growing requirements for each of your plants, and group them near plants with similar needs. This will help them do well and it will make maintaining your yard a much easier task.

To make this step much easier, use the Simplyscapes design tool to place your plants in the proper areas of your landscape and use the tools in the planting bed tab to visualize the different needs of all of your plants.
5. Time to Plant
Late spring and early fall are the best times of year to transplant plants in your yard. The temperatures are not scorching, so it lessens the effect of transplant stress. If you do want to add plants to your yard in the summertime, do it on a rainy day or in the early morning/late evening.

Beware of the temptation to plant everything on the first warm weekend of the year. Your plants are much less likely to survive when temperatures inevitably drop again, and it adds pressure for you to cover them effectively or know to bring them inside when Mother Nature decides to leave a frozen white present on your freshly planted tomatoes. Instead, refer to the last average frost day for your region as the beginning of what should be a safe time to plant. For many areas with four seasons, this is often near Mother's Day.
6. Out of the Pot
Getting plants out of the pot can sometimes be tricky! For small to medium plants, gently hold the base of the plant in one hand, tip it upside down, and hold the pot with your other hand. Push your hands downward to try and gently shake the plant out. If needed, squeeze or bump the pot to urge it to let go of the plant.
For larger plants, like trees, gently lay the tree on its side, and then push on the side of the pot and try to pull the pot away from the root ball. You may need to roll it a bit to push on each side before it releases its grip.
7. Roots
Now that you’ve pulled the plant out of the pot, check the roots—if there are any roots that are growing in a circle around the pot, cut those ones to encourage them to grow outward.
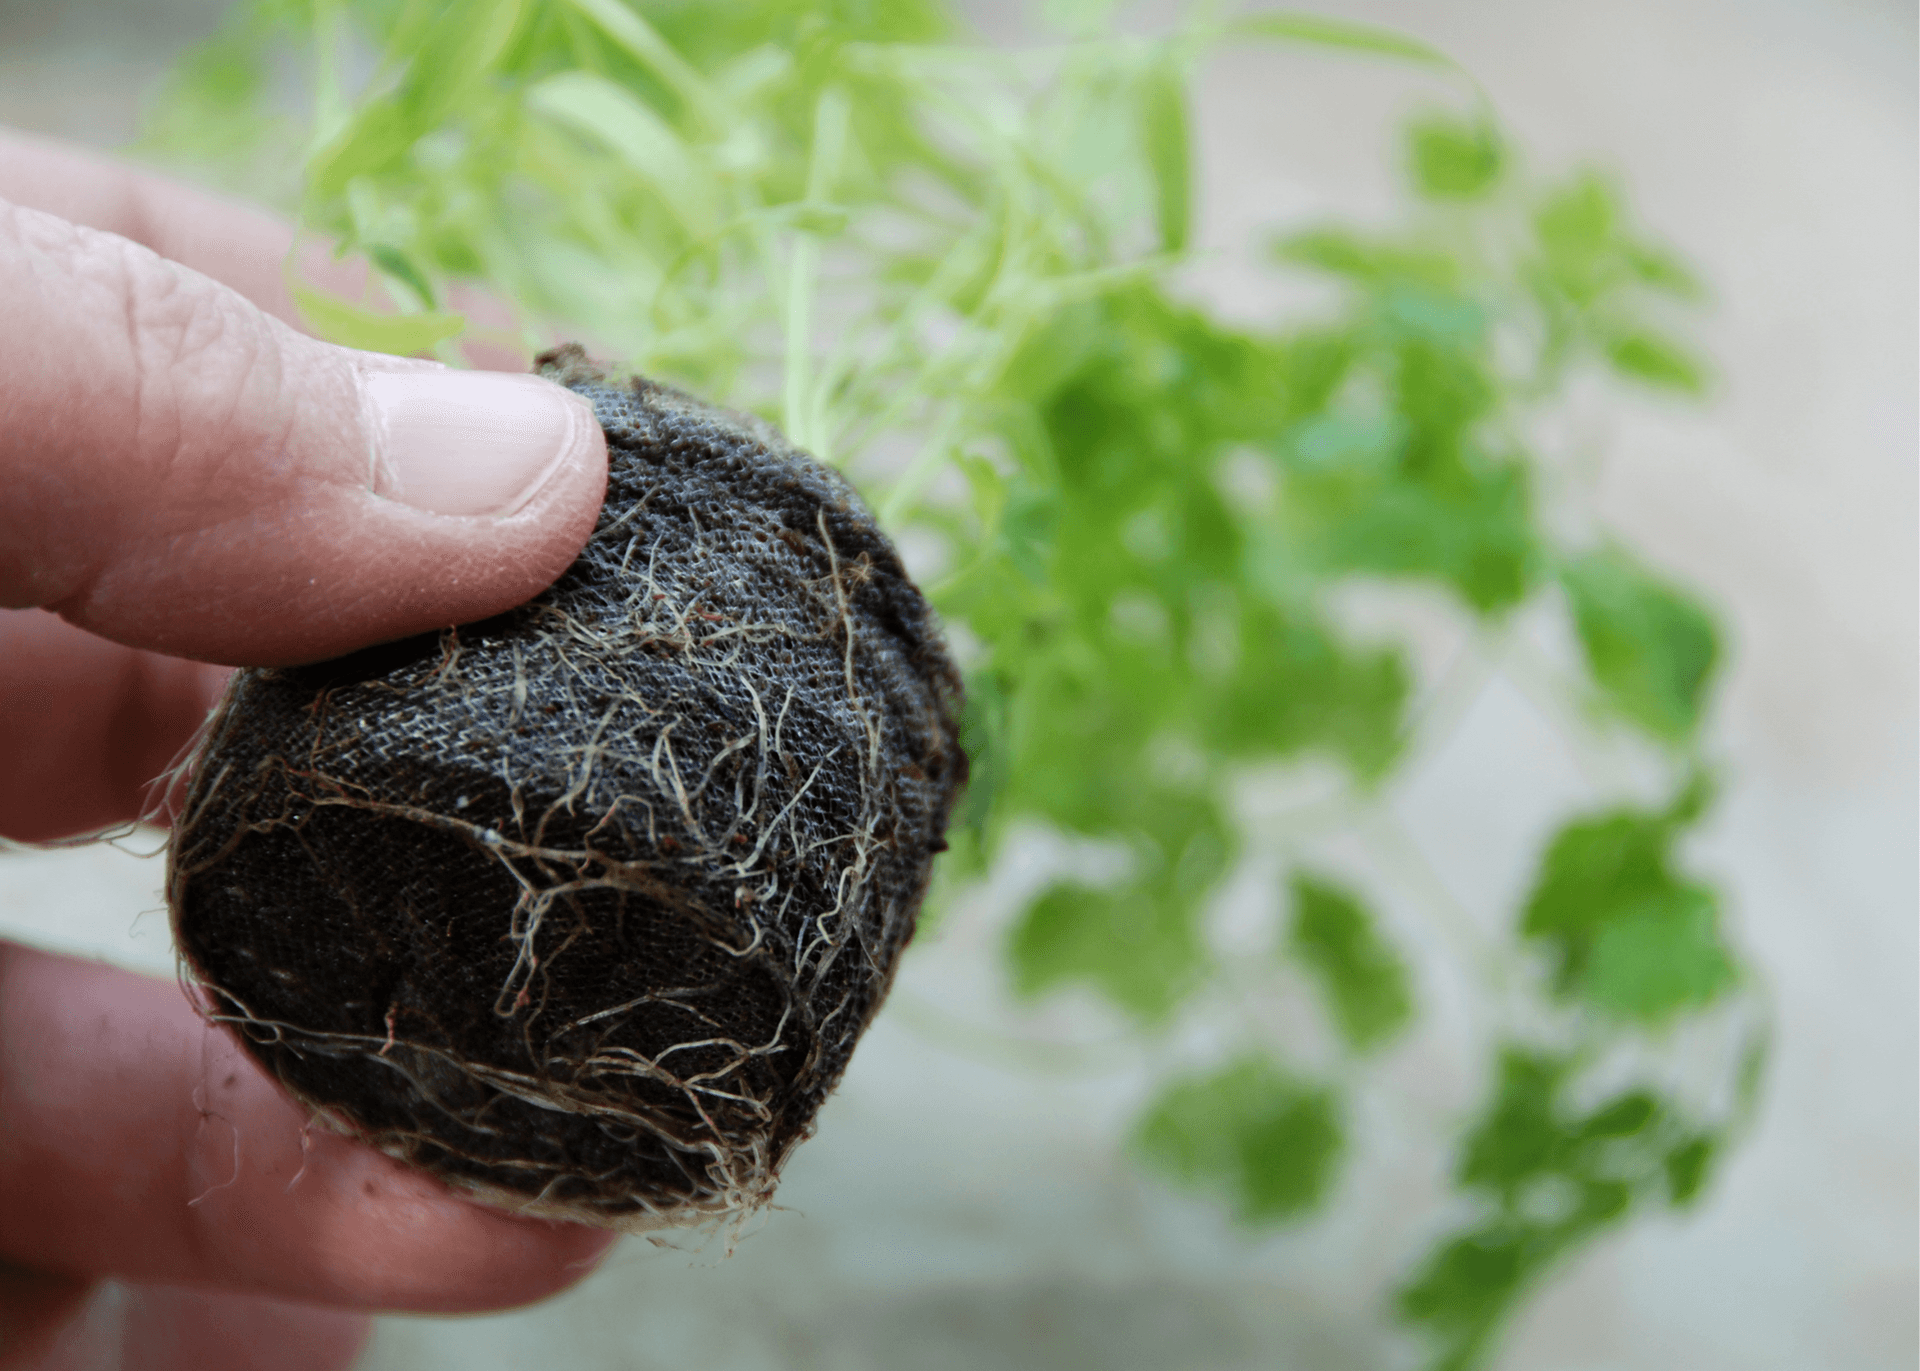
The same should be done if there is a mass of roots at the bottom of the pot. Cut a few or pull them apart gently with your hands to re-train them to grow down and out.
8. Digging and Planting
When planting transplants in your yard, dig a hole that is twice as wide but only as deep as the plant. One easy trick to check for depth is to put the potted plant in the hole you’re digging. If the soil level in the pot matches the soil level of the surrounding ground, you’ve gone deep enough.

Once you’ve taken the plant out of the pot and placed it in the hole, fill the rest of the space back in with the soil you just dug out—not new potting soil. If the soil is far to sandy or clay-like and desperately needs to be amended, mix in some organic material with the soil you took out. As you fill in the hole, tamp it down gently but firmly with your foot to make sure there aren’t any major air pockets around the root system.
9. Watering
After you’ve planted your transplants, water them deeply. Let a couple days go by, then check for soil dryness. If the soil is dry a couple inches down, give the plant another good drink. You don’t want to keep the soil constantly wet, as this will cause them to rot. Give it a few days between watering—this enables the plants to dry out enough between waterings.
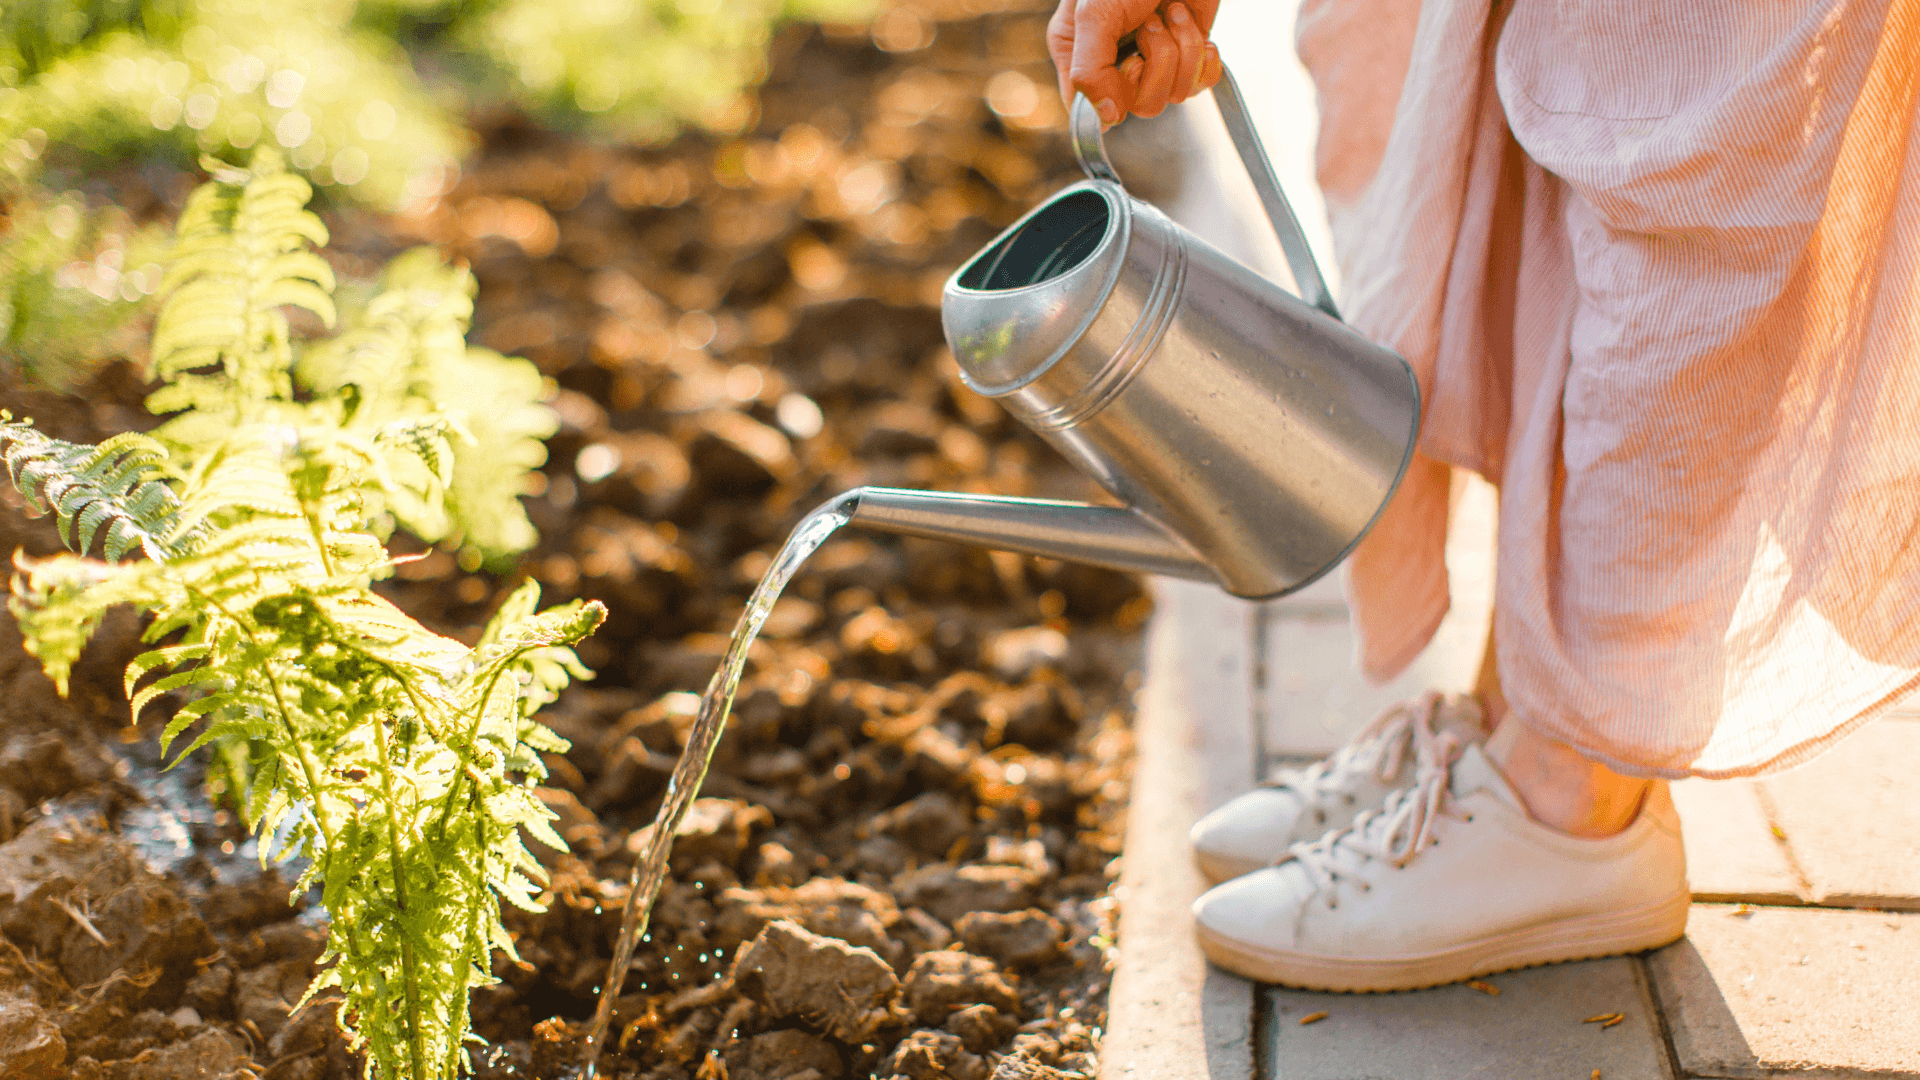
When you do water, make sure it’s a good, deep watering and not frequent shallow drinks. This encourages the plants to send roots out deeper to find water beneath the soil surface—a skill that increases their shot at survival. If you’ve planted native plants, eventually, they won’t need to be watered very often, if at all. In the early stages, though, you’ll want to help them get established.
10. Mulch
After you’ve installed your plants, adding a surrounding layer of mulch is a great step to take. Mulch helps keep the soil temperature more constant, retains water, and keeps weeds down. A layer that's about two to four inches deep is a great addition to your planter beds.
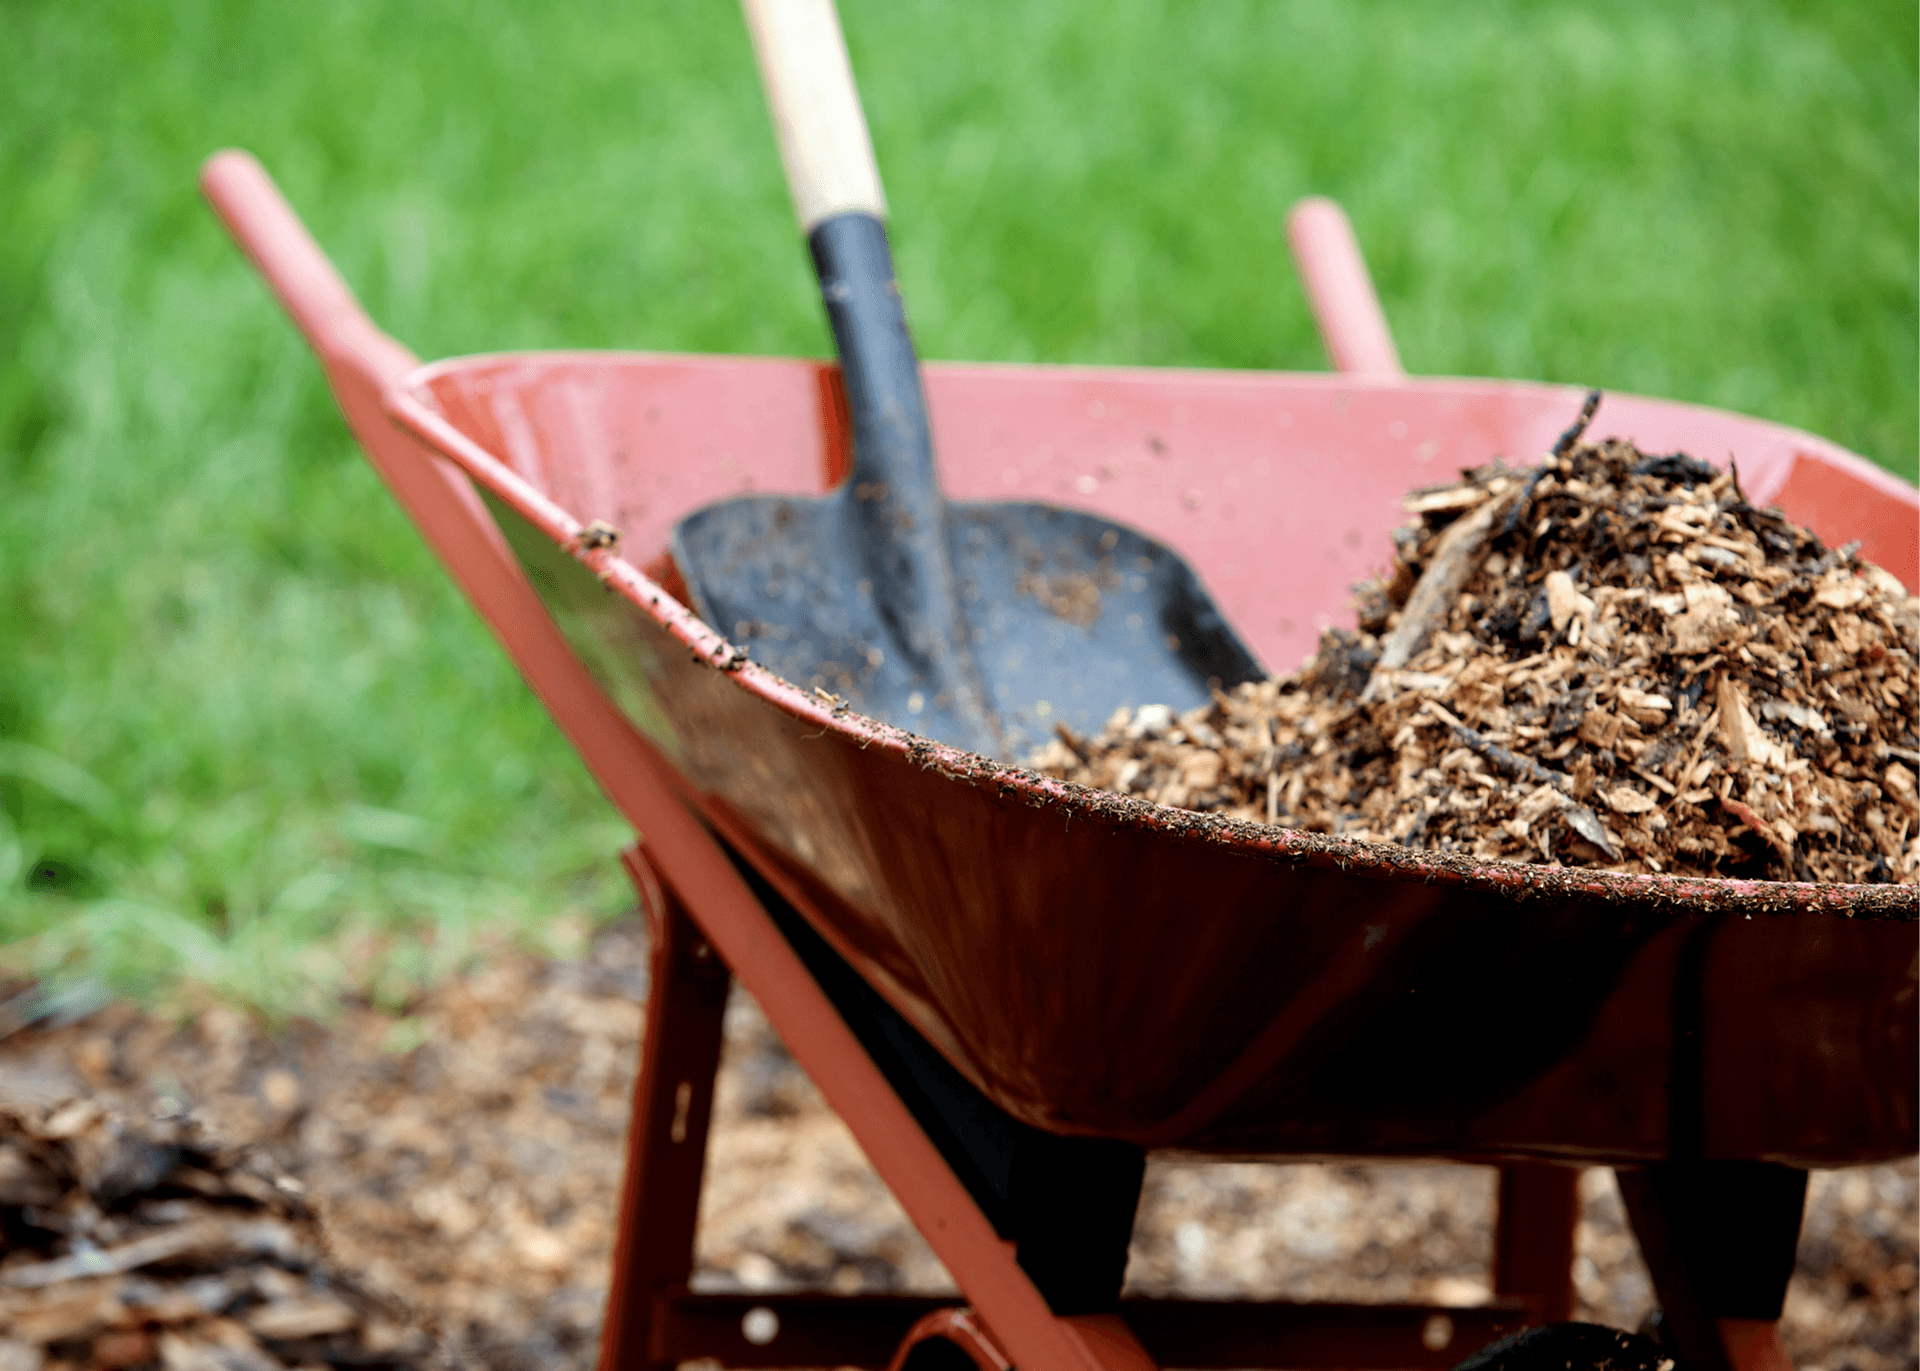
One thing to note, however, is that mulch should not be thickly layered right up to a tree trunk—this can promote rot. When it comes to trees and shrubs, cover the surrounding area with mulch but stay at least five inches from the trunk, tapering up to the thicker layer of mulch as you get further from the tree or shrub.
Armed with these ten tips, you’re all set to add some beautiful plants to your yard! Happy planting!


